
Broken clasps, loose stones and tangled chains don’t always need a trip to the jeweller. Learning basic jewellery repair at home can save you time and money while keeping your favourite pieces wearable.
This guide covers easy, safe fixes you can do with simple tools.
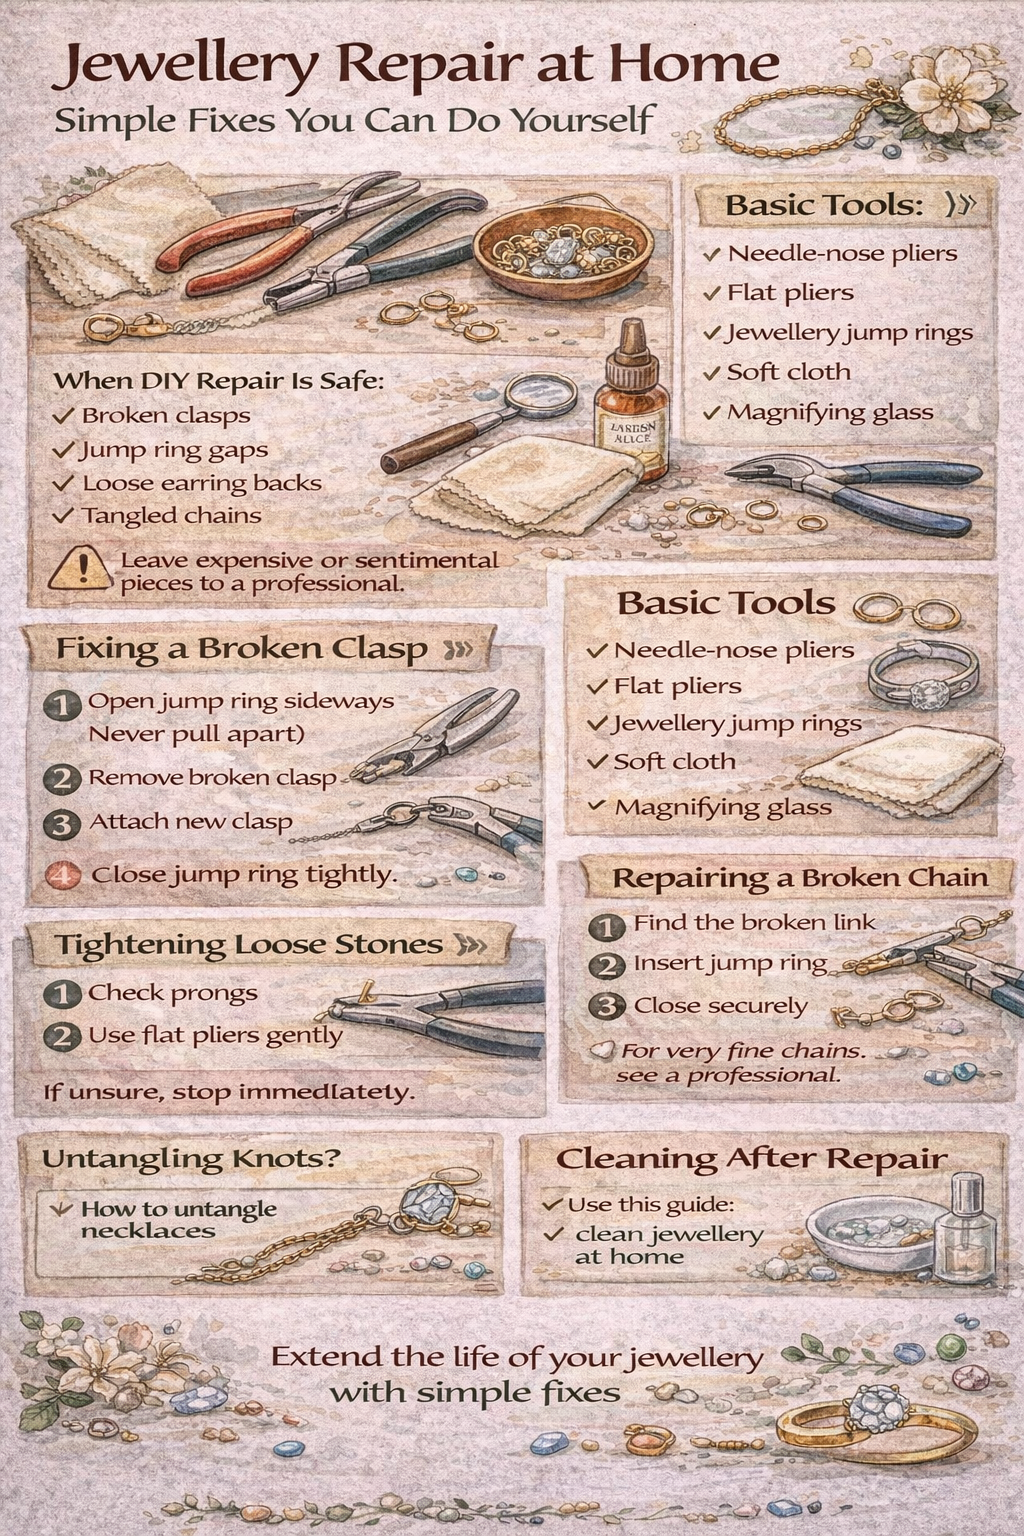
When DIY Repair Is Safe
You can safely fix:
- Broken clasps
- Jump ring gaps
- Loose earring backs
- Tangled chains
Leave expensive or sentimental pieces to a professional.
Basic Tools You’ll Need
- Needle-nose pliers
- Flat pliers
- Jewellery jump rings
- Soft cloth
- Magnifying glass
Fixing a Broken Clasp
- Open jump ring sideways (never pull apart)
- Remove broken clasp
- Attach new clasp
- Close jump ring tightly
Tightening Loose Stones
Only for basic settings:
- Check prongs
- Use flat pliers gently
- Press prongs slightly inward
If unsure, stop immediately.
Repairing a Broken Chain
- Find the broken link
- Insert jump ring
- Close securely
For very fine chains, see a professional.
Fixing Earrings
- Tighten loose posts
- Replace silicone backs
- Clean with soft cloth
Untangling Knots
See our full guide:
How to untangle necklaces
Cleaning After Repair
Always clean jewellery after fixing.
Use this guide:
How to clean jewellery at home
Rustic & Handmade Jewellery Repairs
Handmade pieces need extra care.
- Avoid polishing oxidised finishes
- Do not force stones
Learn more:
What is rustic jewellery?
When to Visit a Professional Jeweller
- Broken prongs
- Resizing rings
- Valuable stones
- Cracked bands
Final Thoughts
Basic jewellery repair at home helps extend the life of your favourite pieces.
When in doubt, don’t risk it – professionals exist for a reason.
FAQ
Can super glue fix jewellery?
No – it damages metal and stones.
How much does a jeweller charge?
Simple fixes are usually inexpensive.
Should I repair gold jewellery myself?
Only minor fixes – otherwise seek help.
